Casting with AS 970 is almost identical to casting with AS 925. Here is what I used.
Torch:
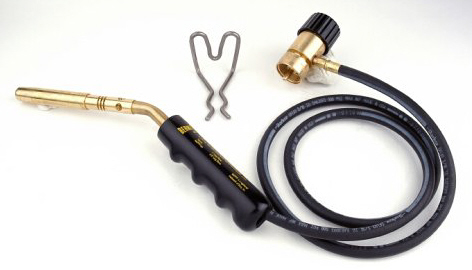
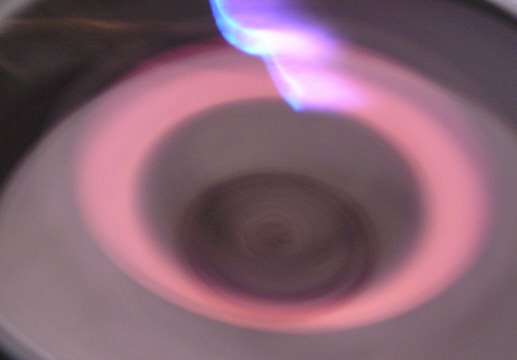
The torch I use is a BernzOmatic® Jet Torch Kit (JTH7). Using this torch with MAPP gas, produces a flame that, at least for me, is perfect for casting with Argentium® Sterling Silver.

Centrifuge:
The centrifuge I use is a simple to use Neycraft® Centrifugal Caster.

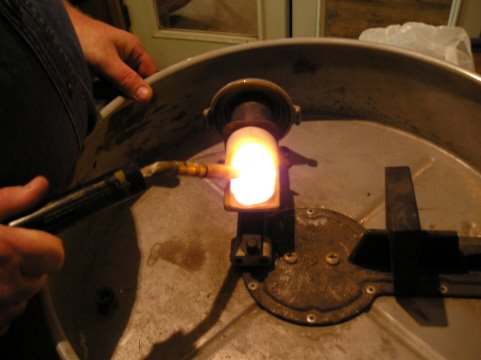
The centrifuge is wound up and prepared for the cast. The burned out flask was placed directly from the kiln into the centrifuge. At this point it is important to preheat the crucible to red hot before adding the casting grain. Add the casting grain and a pinch of Borax. Heat the casting grain as quickly as possible being careful to hold the flame in a manor that prevents air from getting to the alloy as much as possible. I like to heat the casting grain only enough to make sure it is fluid. Heating the alloy any longer or hotter may produce inferior results. Once the alloy is fluid, release the centrifuge immediately.


After the casting is complete, I like to allow the flask to air cool completely before removing the cast from the flask. This will produce a very hard cast and will eliminate the risk of cooling the alloy too quickly which may cause it to crack.
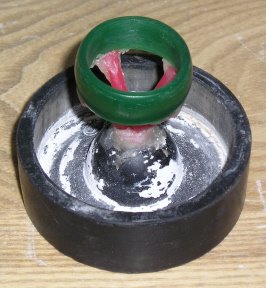
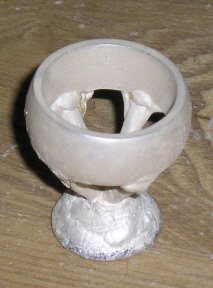
After removing the cast from the flask, I like to clean it off with water and a tooth brush. The cast has a light brown coating on it that easily comes of with a tooth brush. Note how clean and bright the Argentium® Sterling Silver 970 cast is compared to regular sterling silver. WOW. If you look carefully at the photo of the AS 970 you can see the light brown coating in the small crevices of the cast. Now the cast is ready to pickle.

After pickling, the cast is ready to finish. I chose to add hammer marks to this band before finishing. The ring when completed had a beautiful deep luster that unfortunately I was unable to capture in my photographs.
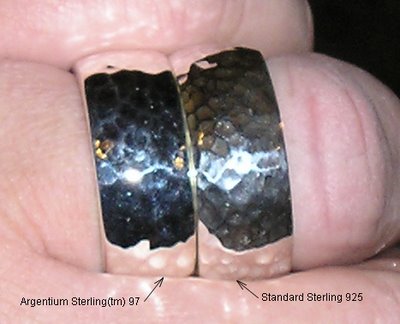
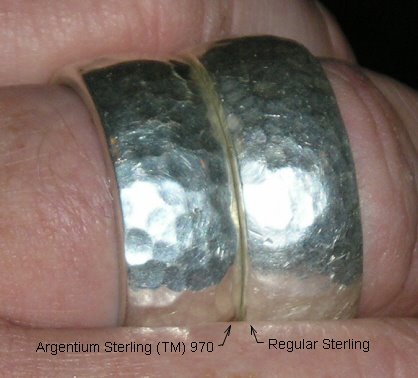
I cast an identical regular sterling silver ring to use as a comparison. Below is a picture of the two rings side-by-side. If you were to look at the two rings separately, you probably would not notice any real differences between the two rings, but put them together and it’s easy to tell the difference. The AS 970 ring had a much deeper luster than the regular sterling silver. In very bright light, the regular sterling silver ring had a slight yellowish tint when compared to the Argentium® Sterling Silver 970.
After I made the two identical rings, I decided to do a durability test on the two rings to see how they would look after being worn on the same finger for one month. Only days after I started wearing the rings, the regular sterling silver ring started showing a slight gray tint and was not holding its shine nearly as well as the Argentium® Sterling Silver 970. The high points on the hammer marks were much more scuffed and the dents and dings from wear were much deeper on the regular sterling silver.
At the end of the month long test period, there was quite a dramatic difference in the two rings. The two rings were not cleaned or polished during the testing period. Both rings had some deep scratches, but the regular sterling ring had many more deep scratches than the AS 970. The color was still deeper and brighter on the Argentium® Sterling Silver 970 ring. The AS 970 ring still looked nearly new. The hammer marks on the regular sterling silver ring are nearly worn off in some areas. There was no noticeable wear on the hammer marks on the AS 970 ring.
 It was a little surprising to see the number of people that commented on how beautiful the AS 970 ring is.
Torch:
The torch I use is a BernzOmatic® Jet Torch Kit (JTH7). Using this torch with MAPP gas, produces a flame that, at least for me, is perfect for casting with Argentium® Sterling Silver.
Centrifuge:
The centrifuge I use is a simple to use Neycraft® Centrifugal Caster.

After calculating the amount of casting grain needed. The wax pattern was dipped in a debubblizer and allowed to dry. Investment was then added to the flask, the air was vibrated out, and the flask was allowed to cure. The next day, the flask was burned out in a kiln.

The centrifuge is wound up and prepared for the cast. The burned out flask was placed directly from the kiln into the centrifuge. At this point it is important to preheat the crucible to red hot before adding the casting grain. Add the casting grain and a pinch of Borax. Heat the casting grain as quickly as possible being careful to hold the flame in a manor that prevents air from getting to the alloy as much as possible. I like to heat the casting grain only enough to make sure it is fluid. Heating the alloy any longer or hotter may produce inferior results. Once the alloy is fluid, release the centrifuge immediately.
After the casting is complete, I like to allow the flask to air cool completely before removing the cast from the flask. This will produce a very hard cast and will eliminate the risk of cooling the alloy too quickly which may cause it to crack.
After removing the cast from the flask, I like to clean it off with water and a tooth brush. The cast has a light brown coating on it that easily comes of with a tooth brush. Note how clean and bright the Argentium® Sterling Silver 970 cast is compared to regular sterling silver. WOW. If you look carefully at the photo of the AS 970 you can see the light brown coating in the small crevices of the cast. Now the cast is ready to pickle.

After pickling, the cast is ready to finish. I chose to add hammer marks to this band before finishing. The ring when completed had a beautiful deep luster that unfortunately I was unable to capture in my photographs.
I cast an identical regular sterling silver ring to use as a comparison. Below is a picture of the two rings side-by-side. If you were to look at the two rings separately, you probably would not notice any real differences between the two rings, but put them together and it’s easy to tell the difference. The AS 970 ring had a much deeper luster than the regular sterling silver. In very bright light, the regular sterling silver ring had a slight yellowish tint when compared to the Argentium® Sterling Silver 970.
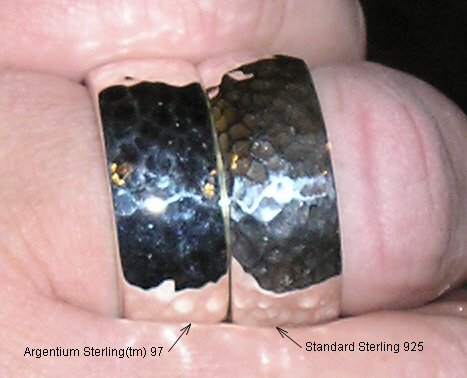
After I made the two identical rings, I decided to do a durability test on the two rings to see how they would look after being worn on the same finger for one month. Only days after I started wearing the rings, the regular sterling silver ring started showing a slight gray tint and was not holding its shine nearly as well as the Argentium® Sterling Silver 970. The high points on the hammer marks were much more scuffed and the dents and dings from wear were much deeper on the regular sterling silver.
At the end of the month long test period, there was quite a dramatic difference in the two rings. The two rings were not cleaned or polished during the testing period. Both rings had some deep scratches, but the regular sterling ring had many more deep scratches than the AS 970. The color was still deeper and brighter on the Argentium® Sterling Silver 970 ring. The AS 970 ring still looked nearly new. The hammer marks on the regular sterling silver ring are nearly worn off in some areas. There was no noticeable wear on the hammer marks on the AS 970 ring.
No comments:
Post a Comment