Working with Argentium Sterling Silver? I would love to hear of your unique experiences using Argentium Sterling Silver and post the info here. I've posted some of my experiences here, both good and bad. I try to keep the information as simple as I can. If there is anything I can help with, please feel free to ask.
Friday, July 10, 2009
Russian Filigree with Argentium Sterling Silver
Tuesday, March 20, 2007
Argentium® Tips for new users
If you are new to Argentium® Sterling, here are some things that I have noted while working with Argentium® Sterling:
1. Argentium® Sterling does not react in the same manor as regular Sterling Silver. It is much easier to not compare it to regular Sterling and just think of it as a completely different alloy.
2. Argentium® loves an oxygenated environment. This is important to remember when considering your working surfaces and fluxes (if you choose to use flux). Remember in the case of Argentium®, the flux is only used to help the solder flow, not to protect it from oxygen. I like to use Rio Grande’s My-T-Flux®. Using a thick paste type flux just makes a mess and keeps the oxygen away from the Argentium®. When it comes to the working surface, there have been reports of possible problems when using charcoal blocks. Charcoal blocks seem to starve the Argentium® of oxygen.
3. Argentium® seems to want to “slump” at high temperatures. It may be necessary to support your work while heating it.
4. Argentium® is a very “white” metal. The color seems to be quite rich and there is a definite difference in color between regular Sterling Silver and Argentium® Sterling Silver.
5. If your Argentium® is getting to the bright orange hot stage when heating, it’s too hot.
6. Care must be taken when the Argentium® is very hot. If you try to move it when it’s even got a slight glow, you run the risk of breaking it. When the Argentium® is very hot, like when you fuse it, it seems to go into a state that is somewhere between solid and liquid. The best way I can think to describe it, is similar to what slush is like in the snow. If you try to move your piece (or press down on it) in this state, it will break apart.
7. I love to fuse with Argentium®. Granules, wire, and sheet all seem to fuse with ease. I think part of it has to do with the way Argentium® likes to “slump”. I have also had good success fusing fine silver to Argentium®. When fused, the joint seems to be very strong. The great thing about fusing is you can make a piece quite rapidly. Start with the largest pieces and work your way down to the smallest. There seems to be no need to pickle in between steps.
8. One of the things I love most about Argentium® Sterling Silver is the ability to “super anneal” it. If you quench the Argentium® a little early, it becomes super malleable. Caution! If you quench too early, it will stress fracture. It takes a little practice, but if you do it, the Argentium® is almost like working with lead.
9. When hammering or working the Argentium® in another way, it seems to be able to go longer between annealings than does regular Sterling Silver. However, go too long and it will crumble without warning.
10. Argentium® can become quite hard after heat hardening. The great thing is, that this can be done at quite low temperatures; 500-550 degrees Fahrenheit. Put it in a toaster oven at that temperature for about an hour, let it cool to room temperature, and you should see a considerable difference in the hardening of the alloy. The thicker the metal, the easier it will be to tell a difference.
11. When casting with Argentium®, if you let the flask cool to room temperature after casting and then remove the piece from the investment, you will find the alloy to be quite hard.
These are just a few of the things I’ve noted when working with Argentium® Sterling. Your results may vary depending on your working conditions. I’m sure I’ve missed some of the other unique characteristics of Argentium® Sterling Silver and since the alloy is still relatively new, I’m sure there is still a lot to learn in the future.
1. Argentium® Sterling does not react in the same manor as regular Sterling Silver. It is much easier to not compare it to regular Sterling and just think of it as a completely different alloy.
2. Argentium® loves an oxygenated environment. This is important to remember when considering your working surfaces and fluxes (if you choose to use flux). Remember in the case of Argentium®, the flux is only used to help the solder flow, not to protect it from oxygen. I like to use Rio Grande’s My-T-Flux®. Using a thick paste type flux just makes a mess and keeps the oxygen away from the Argentium®. When it comes to the working surface, there have been reports of possible problems when using charcoal blocks. Charcoal blocks seem to starve the Argentium® of oxygen.
3. Argentium® seems to want to “slump” at high temperatures. It may be necessary to support your work while heating it.
4. Argentium® is a very “white” metal. The color seems to be quite rich and there is a definite difference in color between regular Sterling Silver and Argentium® Sterling Silver.
5. If your Argentium® is getting to the bright orange hot stage when heating, it’s too hot.
6. Care must be taken when the Argentium® is very hot. If you try to move it when it’s even got a slight glow, you run the risk of breaking it. When the Argentium® is very hot, like when you fuse it, it seems to go into a state that is somewhere between solid and liquid. The best way I can think to describe it, is similar to what slush is like in the snow. If you try to move your piece (or press down on it) in this state, it will break apart.
7. I love to fuse with Argentium®. Granules, wire, and sheet all seem to fuse with ease. I think part of it has to do with the way Argentium® likes to “slump”. I have also had good success fusing fine silver to Argentium®. When fused, the joint seems to be very strong. The great thing about fusing is you can make a piece quite rapidly. Start with the largest pieces and work your way down to the smallest. There seems to be no need to pickle in between steps.
8. One of the things I love most about Argentium® Sterling Silver is the ability to “super anneal” it. If you quench the Argentium® a little early, it becomes super malleable. Caution! If you quench too early, it will stress fracture. It takes a little practice, but if you do it, the Argentium® is almost like working with lead.
9. When hammering or working the Argentium® in another way, it seems to be able to go longer between annealings than does regular Sterling Silver. However, go too long and it will crumble without warning.
10. Argentium® can become quite hard after heat hardening. The great thing is, that this can be done at quite low temperatures; 500-550 degrees Fahrenheit. Put it in a toaster oven at that temperature for about an hour, let it cool to room temperature, and you should see a considerable difference in the hardening of the alloy. The thicker the metal, the easier it will be to tell a difference.
11. When casting with Argentium®, if you let the flask cool to room temperature after casting and then remove the piece from the investment, you will find the alloy to be quite hard.
These are just a few of the things I’ve noted when working with Argentium® Sterling. Your results may vary depending on your working conditions. I’m sure I’ve missed some of the other unique characteristics of Argentium® Sterling Silver and since the alloy is still relatively new, I’m sure there is still a lot to learn in the future.
Thursday, August 10, 2006
Argentium® Sterling Silver 970 now available!
That's right AS970 is now available through G&S Metals! The 97% silver casting grain is being sold as "Argentium Silver Casting Grain(tm)". The following link will take you directly to the page that will tell you all about this wonderful new alloy. http://www.gsgold.com/castinggrain/argentium-silver.htm
If you love the look of fine silver, I think your going to love the look and durability of AS970.
At the time I checked the price of the casting grain it was the same price as fine silver casing grain.
If you love the look of fine silver, I think your going to love the look and durability of AS970.
At the time I checked the price of the casting grain it was the same price as fine silver casing grain.
Saturday, June 03, 2006
Casting Argentium® Sterling Silver 970 using a torch
Casting with AS 970 is almost identical to casting with AS 925. Here is what I used.
Torch:
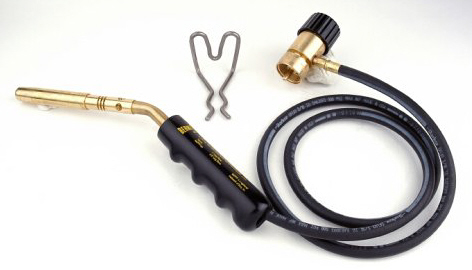
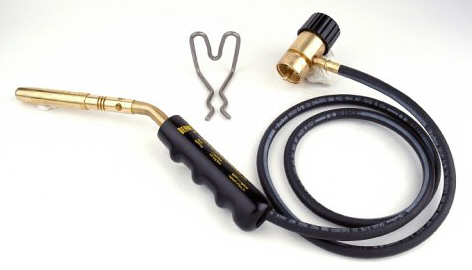
The torch I use is a BernzOmatic® Jet Torch Kit (JTH7). Using this torch with MAPP gas, produces a flame that, at least for me, is perfect for casting with Argentium® Sterling Silver.
Centrifuge:
The centrifuge I use is a simple to use Neycraft® Centrifugal Caster.
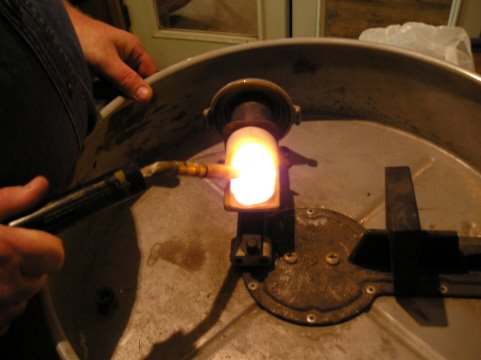
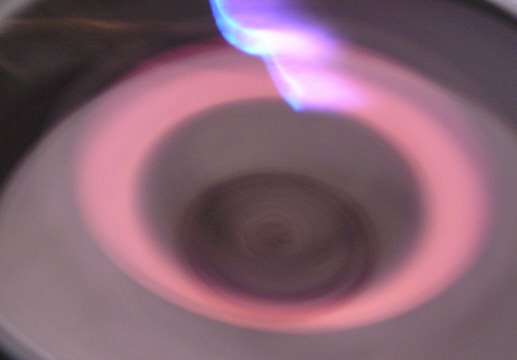
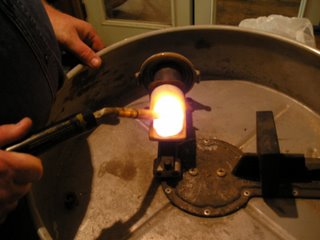
The centrifuge is wound up and prepared for the cast. The burned out flask was placed directly from the kiln into the centrifuge. At this point it is important to preheat the crucible to red hot before adding the casting grain. Add the casting grain and a pinch of Borax. Heat the casting grain as quickly as possible being careful to hold the flame in a manor that prevents air from getting to the alloy as much as possible. I like to heat the casting grain only enough to make sure it is fluid. Heating the alloy any longer or hotter may produce inferior results. Once the alloy is fluid, release the centrifuge immediately.
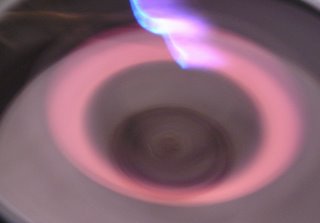
After the casting is complete, I like to allow the flask to air cool completely before removing the cast from the flask. This will produce a very hard cast and will eliminate the risk of cooling the alloy too quickly which may cause it to crack.
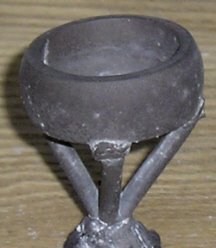
After removing the cast from the flask, I like to clean it off with water and a tooth brush. The cast has a light brown coating on it that easily comes of with a tooth brush. Note how clean and bright the Argentium® Sterling Silver 970 cast is compared to regular sterling silver. WOW. If you look carefully at the photo of the AS 970 you can see the light brown coating in the small crevices of the cast. Now the cast is ready to pickle.
After pickling, the cast is ready to finish. I chose to add hammer marks to this band before finishing. The ring when completed had a beautiful deep luster that unfortunately I was unable to capture in my photographs.
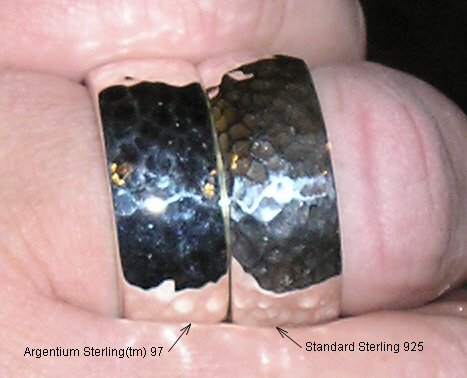
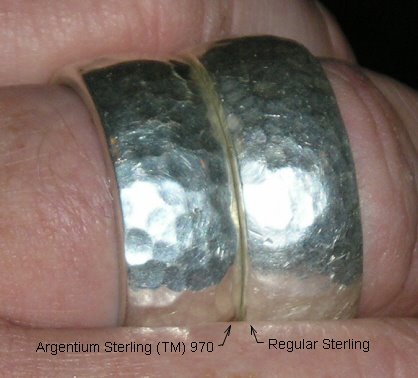
I cast an identical regular sterling silver ring to use as a comparison. Below is a picture of the two rings side-by-side. If you were to look at the two rings separately, you probably would not notice any real differences between the two rings, but put them together and it’s easy to tell the difference. The AS 970 ring had a much deeper luster than the regular sterling silver. In very bright light, the regular sterling silver ring had a slight yellowish tint when compared to the Argentium® Sterling Silver 970.
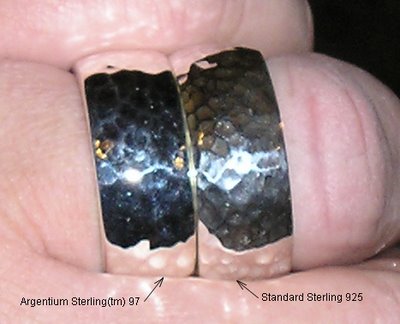
After I made the two identical rings, I decided to do a durability test on the two rings to see how they would look after being worn on the same finger for one month. Only days after I started wearing the rings, the regular sterling silver ring started showing a slight gray tint and was not holding its shine nearly as well as the Argentium® Sterling Silver 970. The high points on the hammer marks were much more scuffed and the dents and dings from wear were much deeper on the regular sterling silver.
At the end of the month long test period, there was quite a dramatic difference in the two rings. The two rings were not cleaned or polished during the testing period. Both rings had some deep scratches, but the regular sterling ring had many more deep scratches than the AS 970. The color was still deeper and brighter on the Argentium® Sterling Silver 970 ring. The AS 970 ring still looked nearly new. The hammer marks on the regular sterling silver ring are nearly worn off in some areas. There was no noticeable wear on the hammer marks on the AS 970 ring.
It was a little surprising to see the number of people that commented on how beautiful the AS 970 ring is.
Torch:
The torch I use is a BernzOmatic® Jet Torch Kit (JTH7). Using this torch with MAPP gas, produces a flame that, at least for me, is perfect for casting with Argentium® Sterling Silver.

Centrifuge:
The centrifuge I use is a simple to use Neycraft® Centrifugal Caster.
After calculating the amount of casting grain needed. The wax pattern was dipped in a debubblizer and allowed to dry. Investment was then added to the flask, the air was vibrated out, and the flask was allowed to cure. The next day, the flask was burned out in a kiln.
The centrifuge is wound up and prepared for the cast. The burned out flask was placed directly from the kiln into the centrifuge. At this point it is important to preheat the crucible to red hot before adding the casting grain. Add the casting grain and a pinch of Borax. Heat the casting grain as quickly as possible being careful to hold the flame in a manor that prevents air from getting to the alloy as much as possible. I like to heat the casting grain only enough to make sure it is fluid. Heating the alloy any longer or hotter may produce inferior results. Once the alloy is fluid, release the centrifuge immediately.

After the casting is complete, I like to allow the flask to air cool completely before removing the cast from the flask. This will produce a very hard cast and will eliminate the risk of cooling the alloy too quickly which may cause it to crack.
After removing the cast from the flask, I like to clean it off with water and a tooth brush. The cast has a light brown coating on it that easily comes of with a tooth brush. Note how clean and bright the Argentium® Sterling Silver 970 cast is compared to regular sterling silver. WOW. If you look carefully at the photo of the AS 970 you can see the light brown coating in the small crevices of the cast. Now the cast is ready to pickle.
After pickling, the cast is ready to finish. I chose to add hammer marks to this band before finishing. The ring when completed had a beautiful deep luster that unfortunately I was unable to capture in my photographs.
I cast an identical regular sterling silver ring to use as a comparison. Below is a picture of the two rings side-by-side. If you were to look at the two rings separately, you probably would not notice any real differences between the two rings, but put them together and it’s easy to tell the difference. The AS 970 ring had a much deeper luster than the regular sterling silver. In very bright light, the regular sterling silver ring had a slight yellowish tint when compared to the Argentium® Sterling Silver 970.
After I made the two identical rings, I decided to do a durability test on the two rings to see how they would look after being worn on the same finger for one month. Only days after I started wearing the rings, the regular sterling silver ring started showing a slight gray tint and was not holding its shine nearly as well as the Argentium® Sterling Silver 970. The high points on the hammer marks were much more scuffed and the dents and dings from wear were much deeper on the regular sterling silver.
At the end of the month long test period, there was quite a dramatic difference in the two rings. The two rings were not cleaned or polished during the testing period. Both rings had some deep scratches, but the regular sterling ring had many more deep scratches than the AS 970. The color was still deeper and brighter on the Argentium® Sterling Silver 970 ring. The AS 970 ring still looked nearly new. The hammer marks on the regular sterling silver ring are nearly worn off in some areas. There was no noticeable wear on the hammer marks on the AS 970 ring.
It was a little surprising to see the number of people that commented on how beautiful the AS 970 ring is.
Friday, June 02, 2006
If you like fine silver, you’re going to love Argentium® Sterling 970
What is Argentium® Sterling Silver 970?To help clarify what AS 970 is, here are a couple of simple definitions to help describe the differences:
Fine Silver: More than 999/1,000 pure silver (99.9% pure silver). Fine silver is considered by many to be too soft for fabrication and use in many forms of jewelry.
Sterling Silver: An alloy of fine silver (92.5%) and other metals, usually copper (7.5%). US law states that all objects marked "sterling," "925" or "925/1000" must contain no less than 92.5% fine silver.
Argentium® Sterling Silver 925: Argentium® Sterling Silver 925 contains at least 92.5% fine silver, but replaces a small amount of the copper that is usually the other 7.5% with germanium.
Argentium® Sterling Silver 970: Argentium® Sterling Silver 970 is like Argentium® Sterling Silver 925 except that it contains at least 97% fine silver.
Why use Argentium® Sterling Silver 970 instead of fine silver?
1. It also improves the tarnish resistance even further than AS 925.
2. Those who have trouble wearing regular sterling silver jewelry should have little or no trouble wearing AS 970 because of it's low copper content.
3. It‘s much harder! AS 970 can be precipitation hardened in the same manor that you would harden Argentium® Sterling 925.
How hard is it?
AS 970 will precipitation harden to the same hardness as AS 925 (approximately 120HV). After precipitation hardening AS 970 or AS 925, you should notice quite a difference, depending on the thickness of the metal, as I did when I precipitation hardened an adjustable ring http://argexp.blogspot.com/2005/08/heat-hardened-argentium-sterling.html .
To help get a better understanding as to how hard it is, please click on the following link http://argexp.blogspot.com/2006/04/hardness-argentium-sterling-vs-gold.html .
Where can you get it? As far as I know the only place to get it at this time is Stern-Leach.
How does it cast?
More to come soon!
Fine Silver: More than 999/1,000 pure silver (99.9% pure silver). Fine silver is considered by many to be too soft for fabrication and use in many forms of jewelry.
Sterling Silver: An alloy of fine silver (92.5%) and other metals, usually copper (7.5%). US law states that all objects marked "sterling," "925" or "925/1000" must contain no less than 92.5% fine silver.
Argentium® Sterling Silver 925: Argentium® Sterling Silver 925 contains at least 92.5% fine silver, but replaces a small amount of the copper that is usually the other 7.5% with germanium.
Argentium® Sterling Silver 970: Argentium® Sterling Silver 970 is like Argentium® Sterling Silver 925 except that it contains at least 97% fine silver.
Why use Argentium® Sterling Silver 970 instead of fine silver?
1. It also improves the tarnish resistance even further than AS 925.
2. Those who have trouble wearing regular sterling silver jewelry should have little or no trouble wearing AS 970 because of it's low copper content.
3. It‘s much harder! AS 970 can be precipitation hardened in the same manor that you would harden Argentium® Sterling 925.
How hard is it?
AS 970 will precipitation harden to the same hardness as AS 925 (approximately 120HV). After precipitation hardening AS 970 or AS 925, you should notice quite a difference, depending on the thickness of the metal, as I did when I precipitation hardened an adjustable ring http://argexp.blogspot.com/2005/08/heat-hardened-argentium-sterling.html .
To help get a better understanding as to how hard it is, please click on the following link http://argexp.blogspot.com/2006/04/hardness-argentium-sterling-vs-gold.html .
Where can you get it? As far as I know the only place to get it at this time is Stern-Leach.
How does it cast?
More to come soon!
Thursday, June 01, 2006
Can't wear Sterling Silver? Try Argentium® Sterling instead

An acquaintance of mine has never been able to wear Sterling silver because it always leaves her skin black in a very short time. I told her about Argentium® Sterling Silver and asked her if she would be willing to be my Guinea Pig to see if she had the same reactions to Argentium® Sterling. I gave her a bracelet (pictured above) and I am pleased to report that she wore it for two weeks continuously without developing any black marks what so ever. Her daughter also had the same problem and has been wearing it for over three weeks. She too has had no problems.
The bracelet was made by fusing Argentium® Sterling Silver jump rings. I used My-T-Flux® to aid in the fusing of the jump rings.
Sunday, May 21, 2006
Casting with Argentium® Sterling Silver - What does it look like?
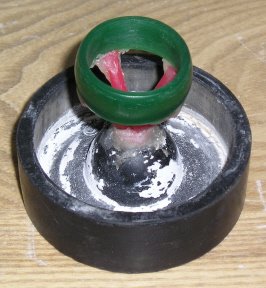
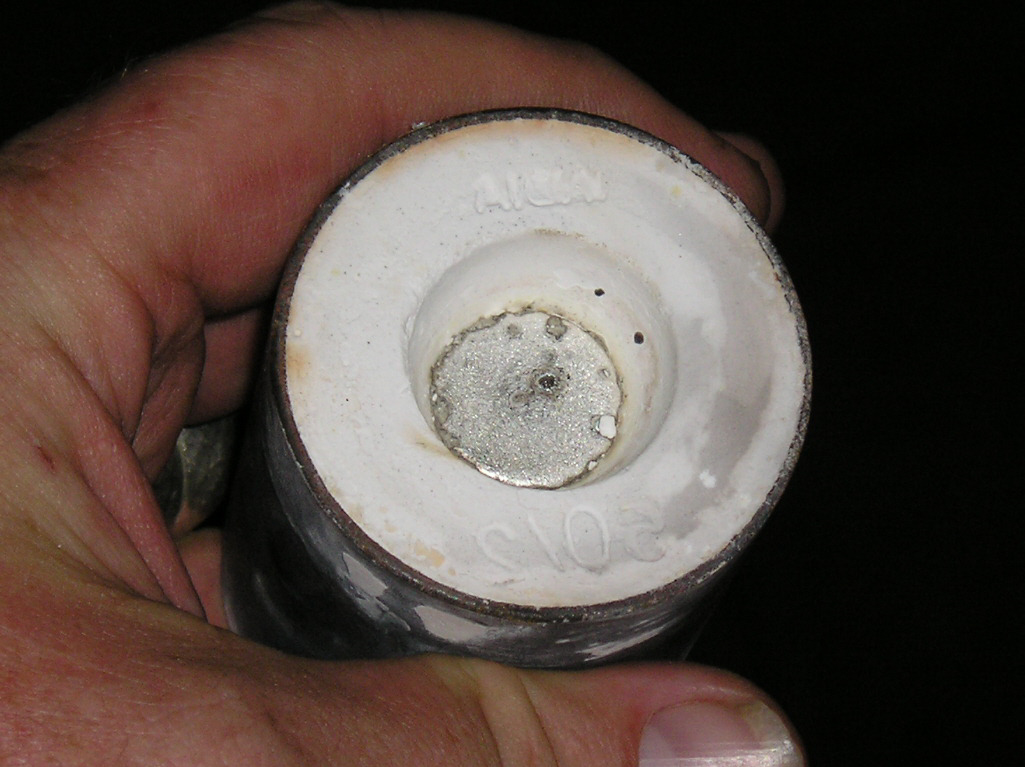
When I cast with Argentium® Sterling silver, I use a torch (MAPP gas) and a centrifuge. After heating the crucible, I add the required amount of AS. After I have started to heat the Argentium® Sterling somewhat, I add a pinch of Borax. The AS melts quite quickly and as soon as it is fully molten, I release the centrifuge. Once the piece is cast, I let it air cool. This will help the Argentium® to become quite hard. Below is a picture of the button of a cast using Argentium® Sterling Silver.

After removing the cast from the flask, I bush it off with a toothbrush. The pictures below show a cast made from Argentium® Sterling Silver (left) and one made using regular Sterling Silver (right). The cast made from AS is somewhat gray but compared to the regular Sterling Silver, it is quite bright.


As you can see, there is quite a difference! The piece is ready to pickle.

After removing the cast from the flask, I bush it off with a toothbrush. The pictures below show a cast made from Argentium® Sterling Silver (left) and one made using regular Sterling Silver (right). The cast made from AS is somewhat gray but compared to the regular Sterling Silver, it is quite bright.


As you can see, there is quite a difference! The piece is ready to pickle.
Saturday, May 13, 2006
Casting Flask Temperature: Additional Information
Peter Johns, the inventor of Argentium® Sterling, sent me the following information:
"We have found that flask temperature is not critical but metal temperature is. Metal temperature should be between 1740 F and 1800 F. Flask temperature should be what is normal in standard sterling for size and weight of the piece."
"If you are casting into a steel mould I always file all sides of the ingot before rolling. I always thought this was normal practice but I recently found somebody who was not doing it and they were not getting good results."
"We have found that flask temperature is not critical but metal temperature is. Metal temperature should be between 1740 F and 1800 F. Flask temperature should be what is normal in standard sterling for size and weight of the piece."
"If you are casting into a steel mould I always file all sides of the ingot before rolling. I always thought this was normal practice but I recently found somebody who was not doing it and they were not getting good results."
Thursday, May 11, 2006
Question: Casting Flask Temperature.
Question: I am buying AS casting grain and will use it for vacumn casting wax models as well as ingot casting rough plate to mill into sheet metal. Do you have any cautions about casting and then milling the plate? What temperature do you have the flask at when you are ready to take it out of the kiln?
Cynthia Eid's article on Argentium® http://www.cynthiaeid.com/argentium_4-8.html should be very helpful to you. She recommends a flask temperature of below 1250F. I would recommend letting the crucible cool completely before removing the piece. Your casting will be very hard and you may see no need to precipitation harden it.
I haven't been able to afford a roller mill so I won't be much help there. Once you get comfortable with Argentium® Sterling you may want to try "super annealing". First dim the lights, then heat the Argentium® Sterling up to a slight red glow for a few seconds. Be very careful not to overheat the Argentium® Sterling. If you heat it as much as you would regular Sterling Silver it will be too hot. The trick is to quench the alloy just at the right time. Too late, it will only anneal as normal. Too soon, it will develop stress cracks. The time that is right is just after the red glow is gone when seen from a darkened room.
Cynthia Eid's article on Argentium® http://www.cynthiaeid.com/argentium_4-8.html should be very helpful to you. She recommends a flask temperature of below 1250F. I would recommend letting the crucible cool completely before removing the piece. Your casting will be very hard and you may see no need to precipitation harden it.
I haven't been able to afford a roller mill so I won't be much help there. Once you get comfortable with Argentium® Sterling you may want to try "super annealing". First dim the lights, then heat the Argentium® Sterling up to a slight red glow for a few seconds. Be very careful not to overheat the Argentium® Sterling. If you heat it as much as you would regular Sterling Silver it will be too hot. The trick is to quench the alloy just at the right time. Too late, it will only anneal as normal. Too soon, it will develop stress cracks. The time that is right is just after the red glow is gone when seen from a darkened room.
Monday, May 01, 2006
My First Allergy test with Argentium® Sterling

I had a friend volunteer to wear a pair of Argentium® Sterling earrings for me. She has only been able to wear high karat gold. Any gold under 18 karat would cause redness and swelling in her ears. She was also not able to wear Sterling Silver. Wearing Sterling Silver would result in redness and swelling in only an hour or two. Often this would result in infections.
My friend wore the earrings for over a week with no ill affects. She liked them so much she asked me to make her some more.
After the earrings were created, I put them in the oven at 250 deg. Fahrenheit for 20 minutes. I did this to attempt to raise the germanium oxide on the surface of the earrings. After the earrings were taken from the oven, I sterilized them with alcohol.
This test was by no means conclusive, however it was a very positive result for this one person. I am looking forward to doing more testing.
Wednesday, April 05, 2006
Hardness: Argentium Sterling® VS Gold Alloys
Today I decided to research a question I’ve been wondering about for quite some time now; how hard is Argentium Sterling® Silver compared to various karat gold? After doing quite a bit of searching on the WWW, I found two sites that helped me somewhat understand how the many alloys compare.
A great page to help understand the hardness of silver is from the Rio Grande Jewelry Supply. This page, from the Tips and Tricks section, was full of great information. One of the charts on the page shows the hardness in Vickers of Fine Silver, Sterling Silver, and Argentium Sterling® Silver. According to the chart Argentium Sterling® Silver can be both the softest and the hardest of the three.
http://www.riogrande.com/tips/all_tips.asp?offset=100
The technical guide offered at http://www.argentiumsilver.com/ gives the following information: After casting, if the flasks are left to air cool a hardness of approximately 100HV is achieved (this is what I prefer to do when I cast…it‘s very hard!). Precipitation Hardening will achieve a hardness of approximately 120HV.
Finding a good chart for gold (without getting into a bunch of technical data) was much harder. After quite a bit of searching, I found a web page that had a pretty good chart on the hardness of gold alloys. It’s from the U.K. so they show 9 karat gold instead of 10 karat gold as is used in the U.S.. The only thing I don’t like about this web page is it’s one of those that are hard to get out of once you are there.
http://www.24carat.co.uk/hardnessofgoldalloysframe.html
Note that gold doesn’t necessarily get harder as the karat weight goes down.
A great page to help understand the hardness of silver is from the Rio Grande Jewelry Supply. This page, from the Tips and Tricks section, was full of great information. One of the charts on the page shows the hardness in Vickers of Fine Silver, Sterling Silver, and Argentium Sterling® Silver. According to the chart Argentium Sterling® Silver can be both the softest and the hardest of the three.
http://www.riogrande.com/tips/all_tips.asp?offset=100
The technical guide offered at http://www.argentiumsilver.com/ gives the following information: After casting, if the flasks are left to air cool a hardness of approximately 100HV is achieved (this is what I prefer to do when I cast…it‘s very hard!). Precipitation Hardening will achieve a hardness of approximately 120HV.
Finding a good chart for gold (without getting into a bunch of technical data) was much harder. After quite a bit of searching, I found a web page that had a pretty good chart on the hardness of gold alloys. It’s from the U.K. so they show 9 karat gold instead of 10 karat gold as is used in the U.S.. The only thing I don’t like about this web page is it’s one of those that are hard to get out of once you are there.
http://www.24carat.co.uk/hardnessofgoldalloysframe.html
Note that gold doesn’t necessarily get harder as the karat weight goes down.
Sunday, March 19, 2006
My First Attempt at Granulation with Argentium®
Above is my first attempt at granulation with Argentium Sterling® silver. Because it is so easy to fuse AS, I decided to try granulation (my first attempt with any metal). Everything on this pendant was fused, no solder what so ever. Even the bail was fused. The piece is about the size of a US nickel. This was accomplished using a completely fusion process to prevent contaminating the Argentium®.
Here are a few things I noted while making the pendant.
1. I am going to need a smaller brush to more accurately place the granules.
2. If the piece is granulated after doming, the piece must be supported from the bottom to prevent the piece from slumping during heating.
3. Do not move the piece when it is too hot. This will result in the metal breaking.
4. Care must be taken during buffing to prevent the granules from being worn down. You may wish to just use a brass brush to buff the piece.
Sunday, March 12, 2006
Using MY-T-FLUX with Argentium Sterling
For the past month I have been testing Rio Grande's "MY-T-FLUX as suggested by Peter Johns. When using the flux, the silver came out very clean, and the solder flowed well. The flux seemed to work exceptionally well when used while fusing Argentium Sterling. I've been applying the flux with a needle-tip dispenser that I recycled from a printer ink refill kit.
Wednesday, February 08, 2006
Argentium Sterling at Rio Grande's Catalog in Motion
I recently had the honor of meeting Cynthia Eid at the Rio Grande Catalog in Motion Show in Tucson. The link below tells of the experience. What a great show!!!
http://newjewelry.blogspot.com/2006/02/rio-grande-catalog-in-motion.html
Monday, January 02, 2006
Argentium Sterling® Casting details
I have had a few requests for more details on the methods I use to cast my jewelry. For me, it's got to be cheap! I have been collecting lapidary and silversmith equipment for several years, most of it used. Some of the equipment I started with, has never been replaced simply because I have become so accustom to it and there seems to be no need for replacement.
Please note that when I cast, I usually cast around two troy ounces of AS at a time.
The torch I use is a BernzOmatic® Jet Torch Kit (JTH7). Using this torch with MAPP gas, produces a flame that, at least for me, is perfect for casting with Argentium Sterling® Silver. I turn it up full blast and the AS melts rapidly, and yet doesn’t overheat too quickly. Although I have other torches now, this is my favorite for casting because it helps me be as consistent as possible.
As I am melting the Argentium Sterling® Silver, I add a pinch of Borax. I try to heat the AS only as long as needed. As soon as it is liquid, I start the centrifuge.

The centrifuge I use is a simple to use Neycraft® Centrifugal Caster. I take the flask directly from the kiln to the centrifuge. The time it takes for me to put the flask in the centrifuge, and heat the metal, seems to allow the flask time to cool to the proper temperature for casting. After the piece is cast, I allow the flask to cool to room temperature before removing the piece. This helps make the Argentium Sterling® Silver stronger and more durable.
Although this process is quite simple, it has bought me very consistent results that I am very pleased with. Hope this helps! Good luck and Happy Casting :).
If you need Designer Cabochons for your work, you can help support further work on this blog by buying them directly from me at Artfire.
Please note that when I cast, I usually cast around two troy ounces of AS at a time.
The torch I use is a BernzOmatic® Jet Torch Kit (JTH7). Using this torch with MAPP gas, produces a flame that, at least for me, is perfect for casting with Argentium Sterling® Silver. I turn it up full blast and the AS melts rapidly, and yet doesn’t overheat too quickly. Although I have other torches now, this is my favorite for casting because it helps me be as consistent as possible.As I am melting the Argentium Sterling® Silver, I add a pinch of Borax. I try to heat the AS only as long as needed. As soon as it is liquid, I start the centrifuge.

The centrifuge I use is a simple to use Neycraft® Centrifugal Caster. I take the flask directly from the kiln to the centrifuge. The time it takes for me to put the flask in the centrifuge, and heat the metal, seems to allow the flask time to cool to the proper temperature for casting. After the piece is cast, I allow the flask to cool to room temperature before removing the piece. This helps make the Argentium Sterling® Silver stronger and more durable.
Although this process is quite simple, it has bought me very consistent results that I am very pleased with. Hope this helps! Good luck and Happy Casting :).
If you need Designer Cabochons for your work, you can help support further work on this blog by buying them directly from me at Artfire.
Saturday, December 10, 2005
Casting with Argentium Sterling®
I've cast several rings using Argentium Sterling®. I haven't had much to say because there has never really been any problems or strange situations. Here are some of the things to remember when casting with Argentium Sterling®.
Temperature: 1750-1800 deg F. is recommended for casting (casting by sight is not recommended). Unfortunately I don't have the equipment the accurately gage the temperature of the AS so I must go by sight. I have tried to go with the lowest temperature that I can. Remember that if the metal looks yellow or light orange, it is too hot. I have been casting in low light conditions and heating it just until I know all the metal is fluid. The metal at that temperature has an interesting orange glow. One thing that has not been a problem for me is pitting (a common problem using regular Sterling silver). It is my guess that the problem has been lessened, at least in part, due to the lower casting temperatures.
Contamination: As recommended when fabricating with AS, do everything you can to prevent contamination from other alloys. Use a separate crucible, and when it comes time to polish, use buffs reserved only for AS, don't switch between AS and regular Sterling. AS seems to easily pick up copper from contaminated surfaces.
Oxygen: As you would with regular Sterling, protect the alloy from oxygen. I will usually use a pinch boric acid as I am heating the AS to protect it.
Hardening: Once the item is cast, I like to allow the flask to cool to room temperature before removing it from the investment. Cooling to room temperature in this manor makes the piece very hard (you should notice the difference when cutting off the button). The piece can be made only slightly harder if hardened using the precipitation method.
Temperature: 1750-1800 deg F. is recommended for casting (casting by sight is not recommended). Unfortunately I don't have the equipment the accurately gage the temperature of the AS so I must go by sight. I have tried to go with the lowest temperature that I can. Remember that if the metal looks yellow or light orange, it is too hot. I have been casting in low light conditions and heating it just until I know all the metal is fluid. The metal at that temperature has an interesting orange glow. One thing that has not been a problem for me is pitting (a common problem using regular Sterling silver). It is my guess that the problem has been lessened, at least in part, due to the lower casting temperatures.
Contamination: As recommended when fabricating with AS, do everything you can to prevent contamination from other alloys. Use a separate crucible, and when it comes time to polish, use buffs reserved only for AS, don't switch between AS and regular Sterling. AS seems to easily pick up copper from contaminated surfaces.
Oxygen: As you would with regular Sterling, protect the alloy from oxygen. I will usually use a pinch boric acid as I am heating the AS to protect it.
Hardening: Once the item is cast, I like to allow the flask to cool to room temperature before removing it from the investment. Cooling to room temperature in this manor makes the piece very hard (you should notice the difference when cutting off the button). The piece can be made only slightly harder if hardened using the precipitation method.
Friday, December 02, 2005
More flux information
I received an email from Peter Johns, the inventor of Argentium Sterling(tm) Silver. He told me that they have found that some fluxes leave a stain on the surface of the metal. He has found My-T-Flux(tm) from Rio Grande to be very good on Argentium Sterling(tm). My-T-Flux(tm) after washing in hot water and a quick pickle is stain free. He also informed me that Cynthia Eid uses ready made Prip’s flux very successfully with no stains and is very easily removed.
Looks like there are more experiments to be done!
Saturday, November 26, 2005
Argentium® Soldering problems...Results of flux testing
The reason for my soldering problems seems to be the flux I was using. After doing the test, I switched fluxes and have had no problems since.
After doing some research on the web, I was able to find a source for the these F flux. Unfortunately, with shipping, it was way to expensive. I then went to my local rock shop and got five different types of fluxes that they always kept in stock.
I took five pieces of Argentium Sterling® Silver all the same size and placed them on a piece of Argentium Sterling® Silver. A small piece of hard Argentium® Solder was placed by each piece of Argentium Sterling® Silver. I used a different type of flux for each piece of silver. The following is the order, best to worst, of which fluxes did the best (according to my very unscientific test). NOTE: The Ultra Flux® paste is the flux I was using when I had soldering problems.
1. Horizon Tool Co.® Paste Flux ($5.95 for 2 oz.)
2. Cupronil® liquid flux ($4.95 for 4 oz.)
3. Dandix® Paste Flux ($5.50 for 1 oz.)
4. Ultra Flux® Paste ($5.50 for 8 oz.)
5. Batterns® Self-pickling Flux ($7.75 for 16 oz.)
It is surprising what a difference the flux used can make. I know there are lots of other fluxes on the market, some of which, probably work better than the ones I've tried. These are just the ones that are easy for me to get locally. The moral of the story is to keep an open mind when working with Argentium Sterling® Silver. Things that worked alright with regular Sterling Silver, may work differently with AS.
After doing some research on the web, I was able to find a source for the these F flux. Unfortunately, with shipping, it was way to expensive. I then went to my local rock shop and got five different types of fluxes that they always kept in stock.
I took five pieces of Argentium Sterling® Silver all the same size and placed them on a piece of Argentium Sterling® Silver. A small piece of hard Argentium® Solder was placed by each piece of Argentium Sterling® Silver. I used a different type of flux for each piece of silver. The following is the order, best to worst, of which fluxes did the best (according to my very unscientific test). NOTE: The Ultra Flux® paste is the flux I was using when I had soldering problems.
1. Horizon Tool Co.® Paste Flux ($5.95 for 2 oz.)
2. Cupronil® liquid flux ($4.95 for 4 oz.)
3. Dandix® Paste Flux ($5.50 for 1 oz.)
4. Ultra Flux® Paste ($5.50 for 8 oz.)
5. Batterns® Self-pickling Flux ($7.75 for 16 oz.)
It is surprising what a difference the flux used can make. I know there are lots of other fluxes on the market, some of which, probably work better than the ones I've tried. These are just the ones that are easy for me to get locally. The moral of the story is to keep an open mind when working with Argentium Sterling® Silver. Things that worked alright with regular Sterling Silver, may work differently with AS.
Monday, August 15, 2005
Argentium® Soldering Problems Update
Thanks goes to Judie Raiford and Trevor F. for their comments about not using steel wool when soldering. Trevor also mentioned that he preferred to use Thessco F flux when soldering Argentium Sterling® Silver. I believe Thessco is from Europe. I’m going to try some other fluxes that I can get locally and let you know how it goes.
Friday, August 12, 2005
Heat Hardened Argentium Sterling® Silver
I am amazed at how hard Argentium Sterling® Silver turns when it is heat hardened. Last week I made a beautiful turquoise ring. The ring was made so that it could be adjustable. After hardening, I realized the ring was no longer adjustable. Just another one of those things that needs to be kept in mind when working with Argentium Sterling®. Because the properties of Argentium are so different, I have trying to treat Argentium Sterling as though it is a totally different metal, rather than comparing it with standard Sterling Silver. The two metals have very different properties. Standard Sterling conducts heat well, AS does not. Oxygen must be kept away from standard Sterling silver. Oxygen is desirable when working with AS. The melting temperatures are different. The way the metal reacts when heated is different. Working with AS is not that hard, it’s just different.
Subscribe to:
Posts (Atom)